Lab 1: Simulation Setup & Driving
In this lab, you will setup the RACECAR simulation environment and program the car to respond to input by driving in predefined shapes.
First, visit the RacecarSim page and setup the RACECAR Simulation Environment.
You can view the starter code for this lab in the labs directory of your student repository.
Objectives
Main objective
Program the car to respond to controller input and drive in predefined shapes.
Learning objectives
Use the start-update paradigm to create a program which can run on the RACECAR.
Use the drive module to move the RACECAR.
Use the controller module to respond to input from the keyboard in real time.
Before Working on Lab 1
Before starting on our Lab 1, we want to describe the typical flow of labs.
After this lab, most of the labs will follow a similar format. The labs will generally start with a Jupyter Notebook where you can gain a deep understanding of racecar_utils functions that will be implemented in the lab. Then, you will work on a provided python file that will be blocks of code you will need to write yourself.
For both the Juptyer Notebook and the labs, you will assess your own progress based on the ability of your code to perform the desired functionality.
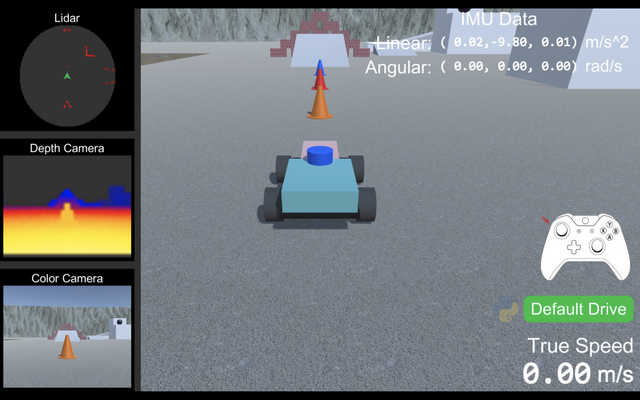
To familiarize yourselves with the code format and the RACECAR simulator, take a look at the demo.py code in VScode and connect it to the simulator. Make sure to enter the Miscellaneous demo level in the simulator first. Play around with the RACECAR and do your best to understand the code in the program. Once you have done this, move onto the Lab 1 instructions.
As an additional note, notice how our RACECAR is colored? Feel free to change the color of yours too in the simulator under settings!
Instructions
Setup
If you have not done so already, please follow the instructions for Setting up your Local Computer.
Warm Up: Driving Controls
Open the racecar directory on your computer in Visual Studio Code. In labs/lab1/lab1.py, replace the TODO: (warm up) comment with code that allows the car to respond to controller input as follows:
When the right trigger is pressed, the car should accelerate forward.
When the left trigger is pressed, the car should accelerate backward.
The front wheels of the car should steer based on the horizontal position of the left joystick.
Main Challenge: Driving in Shapes
For your main challenge, replace the TODO: (main challenge) comments with code that allows the car to drive in predefined shapes when a button is pressed.
After the A button is pressed, the car should drive in a circle. Note that you should only have to press it once and not continue pressing the button for it to drive in a circle.
After the B button is pressed, the car should drive in a square. Note that you should only have to press it once and not continue pressing the button for it to drive in a square.
After the X button is pressed, the car should drive in a figure eight. Note that you should only have to press it once and not continue pressing the button for it to drive in a figure eight.
After the Y button is pressed, the car should drive in a shape of your design. Document this shape in the start message printed by the start function. Note that you should only have to press it once and not continue pressing the button for it to drive in your design.
Your RACECAR should be able to cancel its current action if another action is issued. For example, if the RACECAR is driving in a circle and you press B, your car should immediately start driving in a square instead.
At this point, you do not need to use any of the sensors on the car to calculate how much the car has turned. You will have to experiment with different speeds and times until you reach the desired shapes. This may take a bit but bear with it! We want to show you why we want the RACECAR to work autonomously instead of giving it commands to do.
Hints
Try getting things working yourself first. If you get stuck check out the hints below.
Hints: Timer
Hint (1 of 3): Look back at the demo.py file in your labs directory. This file contains code for a timer. Analyze how the timer is implemented, and use one in your program to control how long the RACECAR is turning as opposed to driving straight for each shape.
Hint (2 of 3): Use rc.get_delta_time() to help create a “timer” for how long the RACECAR should drive. You will want to count the number of seconds since the timer started. You can count the time between each call to update() using rc.get_delta_time(). If you initialize a counter to 0, and add rc.get_delta_time() to the counter each update(), you can determine the total time elapsed. Think about how you can use this.
Hint (3 of 3): The counter variable cannot be inside the update() function, since the value will be reset each time update() is run. You will need a global variable to keep track of the time. For a refresher, click here.
Hints: Controls
Hint (1 of 4): You can get the value for a trigger by using
rc.controller.get_trigger(something_goes_here).Hint (2 of 4): You can get the value of a joystick by using
rc.controller.get_joystick(something_goes_here). The value of the x-axis is the first value in the returned ordered pair and the value of the y-axis is the second value in the returned ordered pair. You can retrieve these values by usingrc.controller.get_joystick(something_goes_here)[0]andrc.controller.get_joystick(something_goes_here)[1]respectively.Hint (3 of 4): Notice the
rc.set_speed_angle(0, 0). We want you to change this so the speed is equal to the trigger values and the angle is equal to the value of the left joystick’s x-axis. For example, if you want to turn hard left and go full speed, you would userc.set_speed_angle(1, -1).Hint (4 of 4): If you define all your instructions in
update(), the RACECAR won’t know what shape to draw after the frame in which the chosen button was pressed. You will need to use a global variable to keep track of what shape to draw.