Setup Instructions
Racecar Installation
You are now ready to clone your racecar repository and install the racecar command line tool by following the instructions on the Racecar Setup Helper (read about all of the inputs below FIRST).
Webpage Inputs
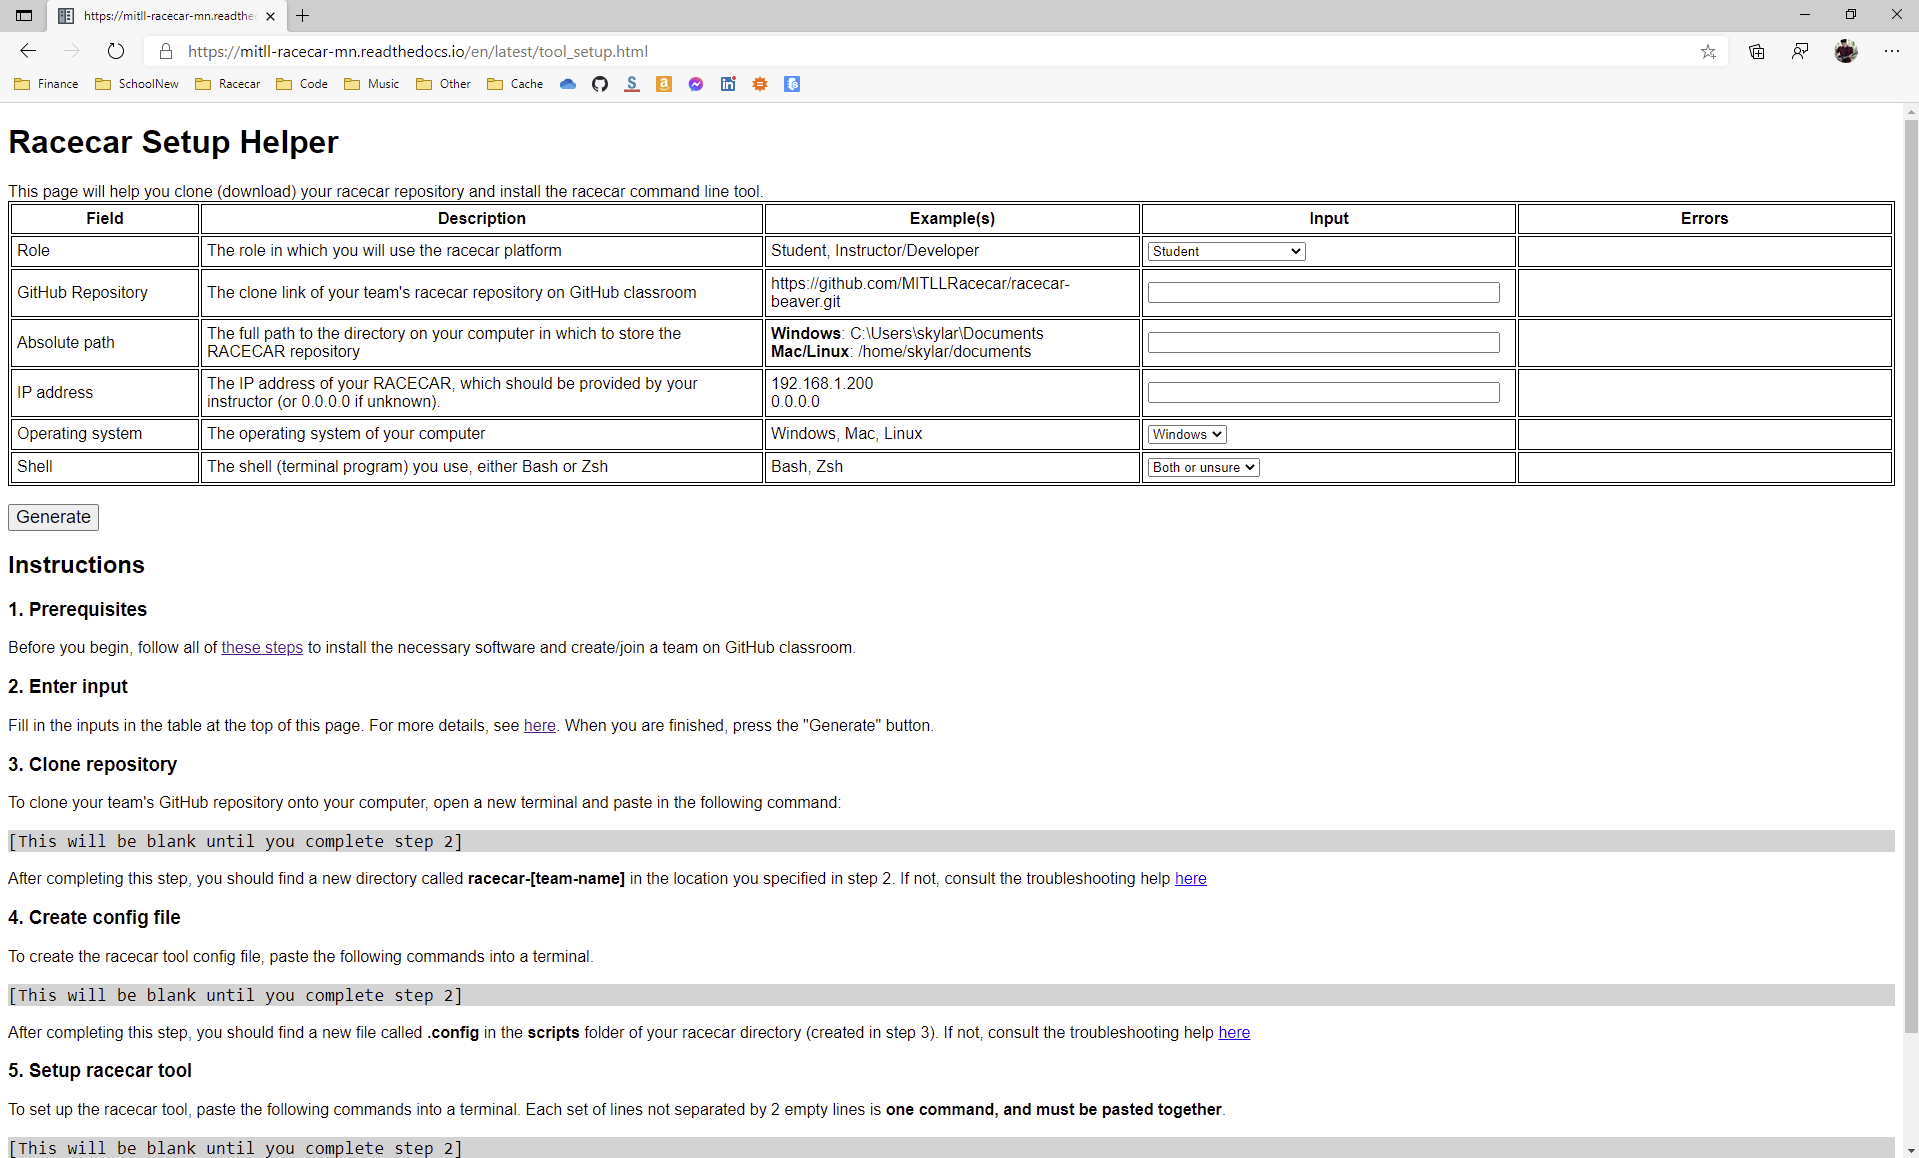
To begin, the Racecar Setup Helper will ask you to provide the following information:
Role: For our uses, select “Instructor or developer”.
Team name (appears if Role is Instructor/Developer): Enter your first name as your team name (in lowercase letters). This will be the name of your folder created on the racecar. Your team name cannot contain a slash character (/).
Absolute path: This is the directory on your computer into which you will download the racecar repository. On Mac or Linux, you can navigate to the directory and type the
pwdcommand to show the absolute path.
On Windows, navigate to the directory in File Explorer. Right click in an empty area and select Properties. The “Location” shown in the properties window is the absolute path up to this directory, so you will need to add the name of the current directory to the end. For the example shown in the picture below, the location is C:\Users\matth\Documents and the name of the directory is Racecar, so the absolute path is C:\Users\matth\Documents\Racecar.

IP Address: This is the static IP address of your racecar assigned by the Wi-Fi router. Use a placeholder for now (such as
0.0.0.0) - we can fill it in later if necessary.Operating System: Select the operating system of your computer, either Windows, Mac, or Linux.
Troubleshooting
If you are using Windows, remember to use bash, as described in Windows Only: Ubuntu on Windows. You cannot use Command Prompt (cmd) or PowerShell.
General Suggestions
If you run into issues, try closing all open terminals and opening a brand new terminal.
If this does not work, try restarting your computer.
Step 3 (Clone repository)
In you are using Windows, and after the git clone command you see an error of the form error: chmod on <some directory path> failed: Operation not permitted, try the following steps.
Restart your computer.
Open a terminal and enter the following commands
sudo umount /mnt/c
sudo mount -t drvfs C: /mnt/c -o metadata
Repeat step 3 from the webpage.
For more details, see this post On StackExchange.
Step 4 (Create config file)
Once you complete this step, you should see a file called .config appear in the scripts folder of your racecar repository. Depending on your settings, this file may be hidden in your file explorer, but you should be able to see it in Visual Studio Code. The contents of the file should look something like this (although the exact values will vary):
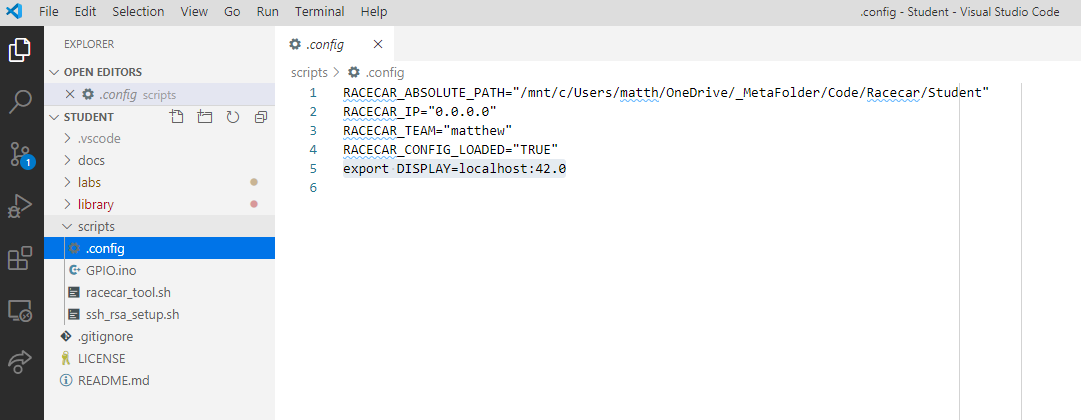
If this file was not created, ask an instructor for help. As a fall back, you can create the file manually in VS Code and add the following text.
Windows:
RACECAR_ABSOLUTE_PATH="<absolute path to your racecar directory>"
RACECAR_IP="<racecar IP address>"
RACECAR_TEAM="<team name>"
RACECAR_CONFIG_LOADED="TRUE"
export DISPLAY=localhost:42.0
Mac or Linux:
RACECAR_ABSOLUTE_PATH="<absolute path to your racecar directory>"
RACECAR_IP="<racecar IP address>"
RACECAR_TEAM="<team name>"
RACECAR_CONFIG_LOADED="TRUE"
sudo sysctl -w net.inet.udp.maxdgram=65535
Replace <absolute path to your racecar directory>, <racecar IP address>, and <team name> with their respective values, as seen in the example above.
Step 5 (Setup racecar tool)
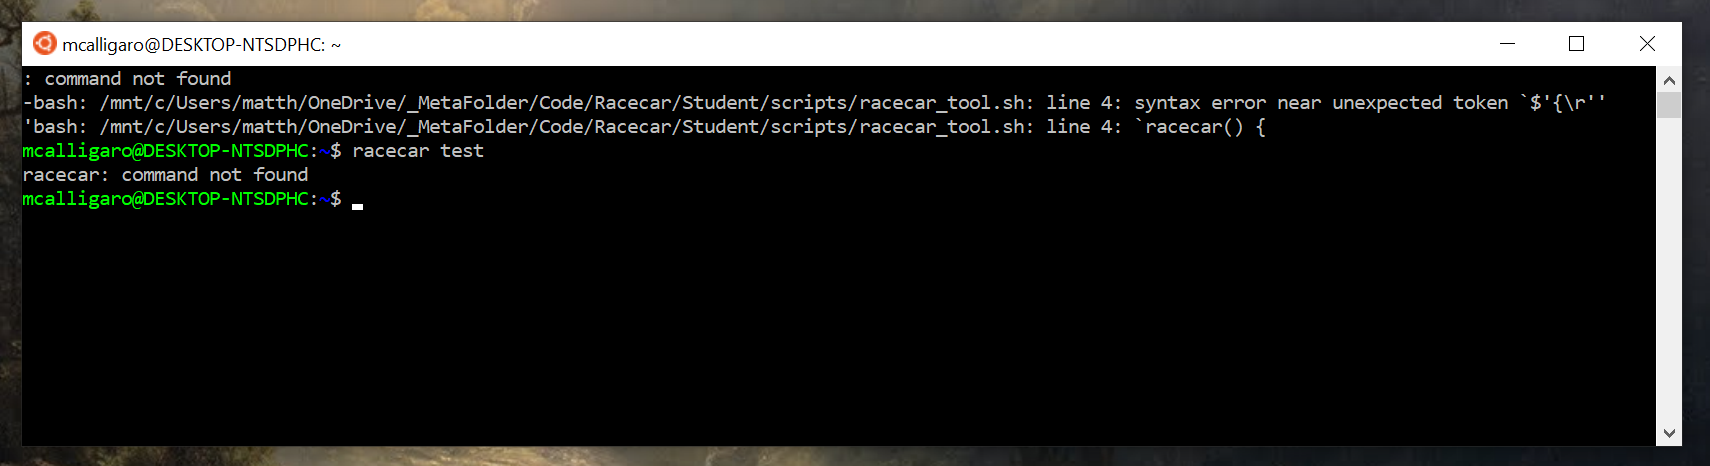
At the end of this step when you run racecar test, if you receive the error racecar: command not found, then the racecar tool was not successfully installed.
The commands you ran in this step add code to your .bashrc/.zshrc to source the .config file (created in step 4) and the racear_tool.sh script. To see if they have been added to your .bashrc, run cat ~/.bashrc if you are using bash or cat ~/.zshrc if you are using zsh. The output should be long, and end with something like this:
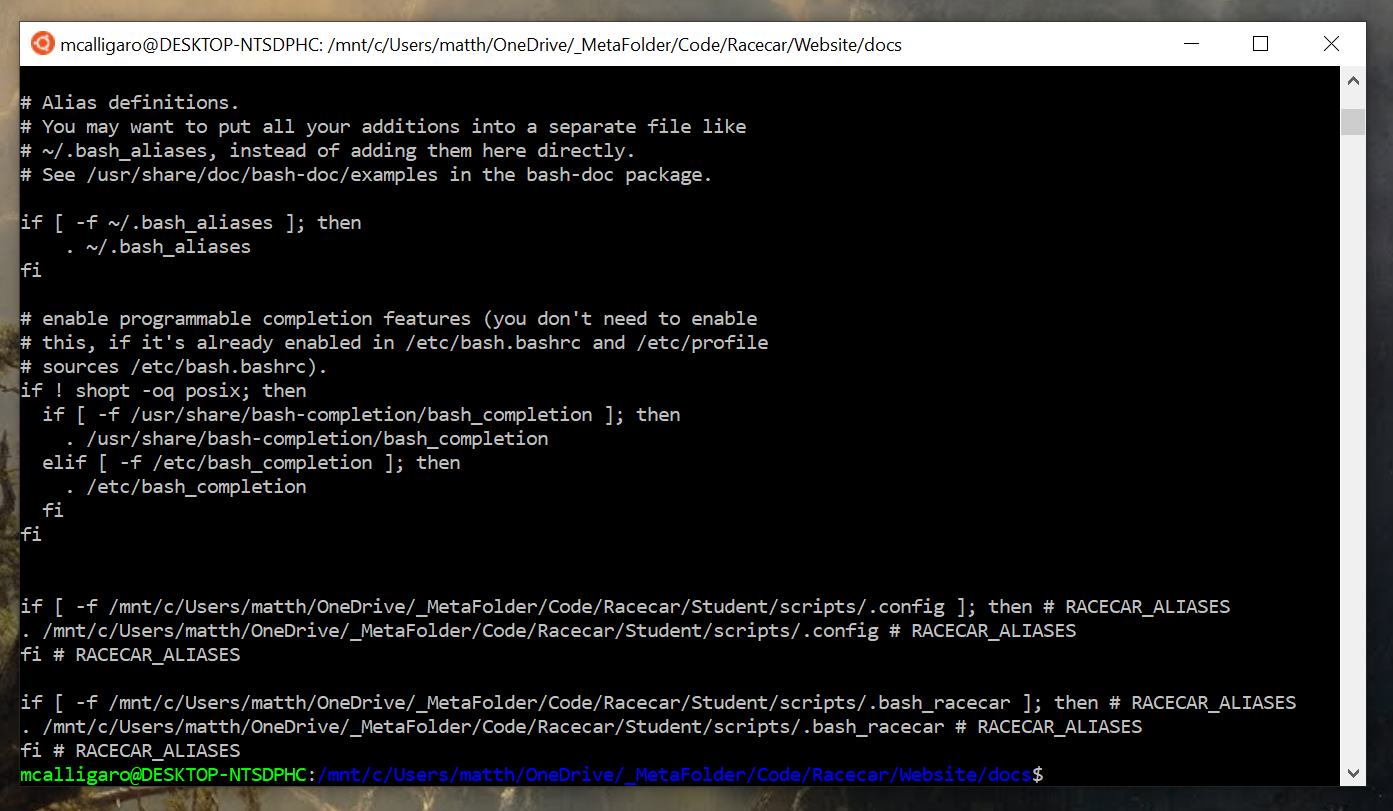
Specifically, you should see two if statements to source .config and .bash_racecar respectively, with each line ending with the tag # RACECAR_ALIASES. Here are some things to check for:
Check that the paths to
.configand.bash_racecarare correct. If not, ask an instructor to help you fix them manually with a command line editor such asnano.Check that there are only two if statements with the
# RACECAR_ALIASEStags (one for.configand one for.bash_racecar). If there are more than two if statements with this tag, an older version may have not been removed properly. With the help of an instructor, usevimornanoto remove the outdated if statements.If you see no such if statements, then the Step 4 command did not properly modify your
.bashrc. Try running the relevant portions of the command again, or ask an instructor for help.If the command
cat ~/.bashrcreturns the errorcat: home/<username>/.bashrc: No such file or directory, then you do not have a.bashrcfile in your home directory. With the help of an instructor, locate your.bashrcfile (it may have another name, such as.bash_profile), and add the two if statements to source.configand.bash_racecar.
If you are on Windows and specifically see the following error when you open a new terminal, your racecar_tool.sh may have the wrong line endings (CRLF instead of LF).
First, open scripts/racecar_tool.sh in Visual Studio. On the bottom right corner of the screen, you should see that it says CRLF instead of LF. Click on the CRLF and change it to LF, then save racecar_tool.sh.
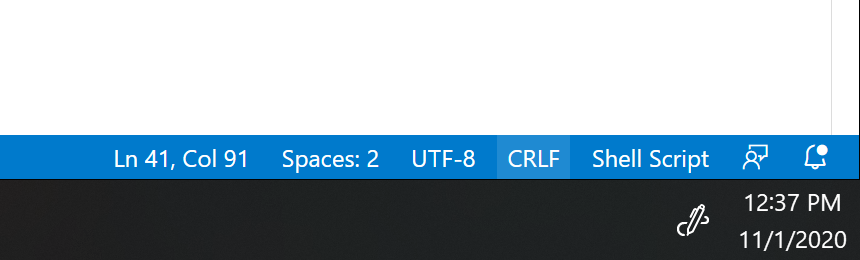
Open a new terminal. If the issue has been resolved, you should now enter git config --global core.autocrlf false on the terminal to make sure it does not happen again. All of the racecar files must have LF endings instead of CRLF (see Windows Only: Ubuntu on Windows for details).
Installing RacecarSim
If you have not done so already, complete all of the steps in Setting up your Local Computer and be sure Racecar Installation (above) is complete.
Download the most recent version of RacecarSim compatible with your operating system using the links below:
RacecarSim will be downloaded as a zipped file. Unzip or untar the directory.
Open the extracted directory to find the executable program. Launch the RacecarSim executable.
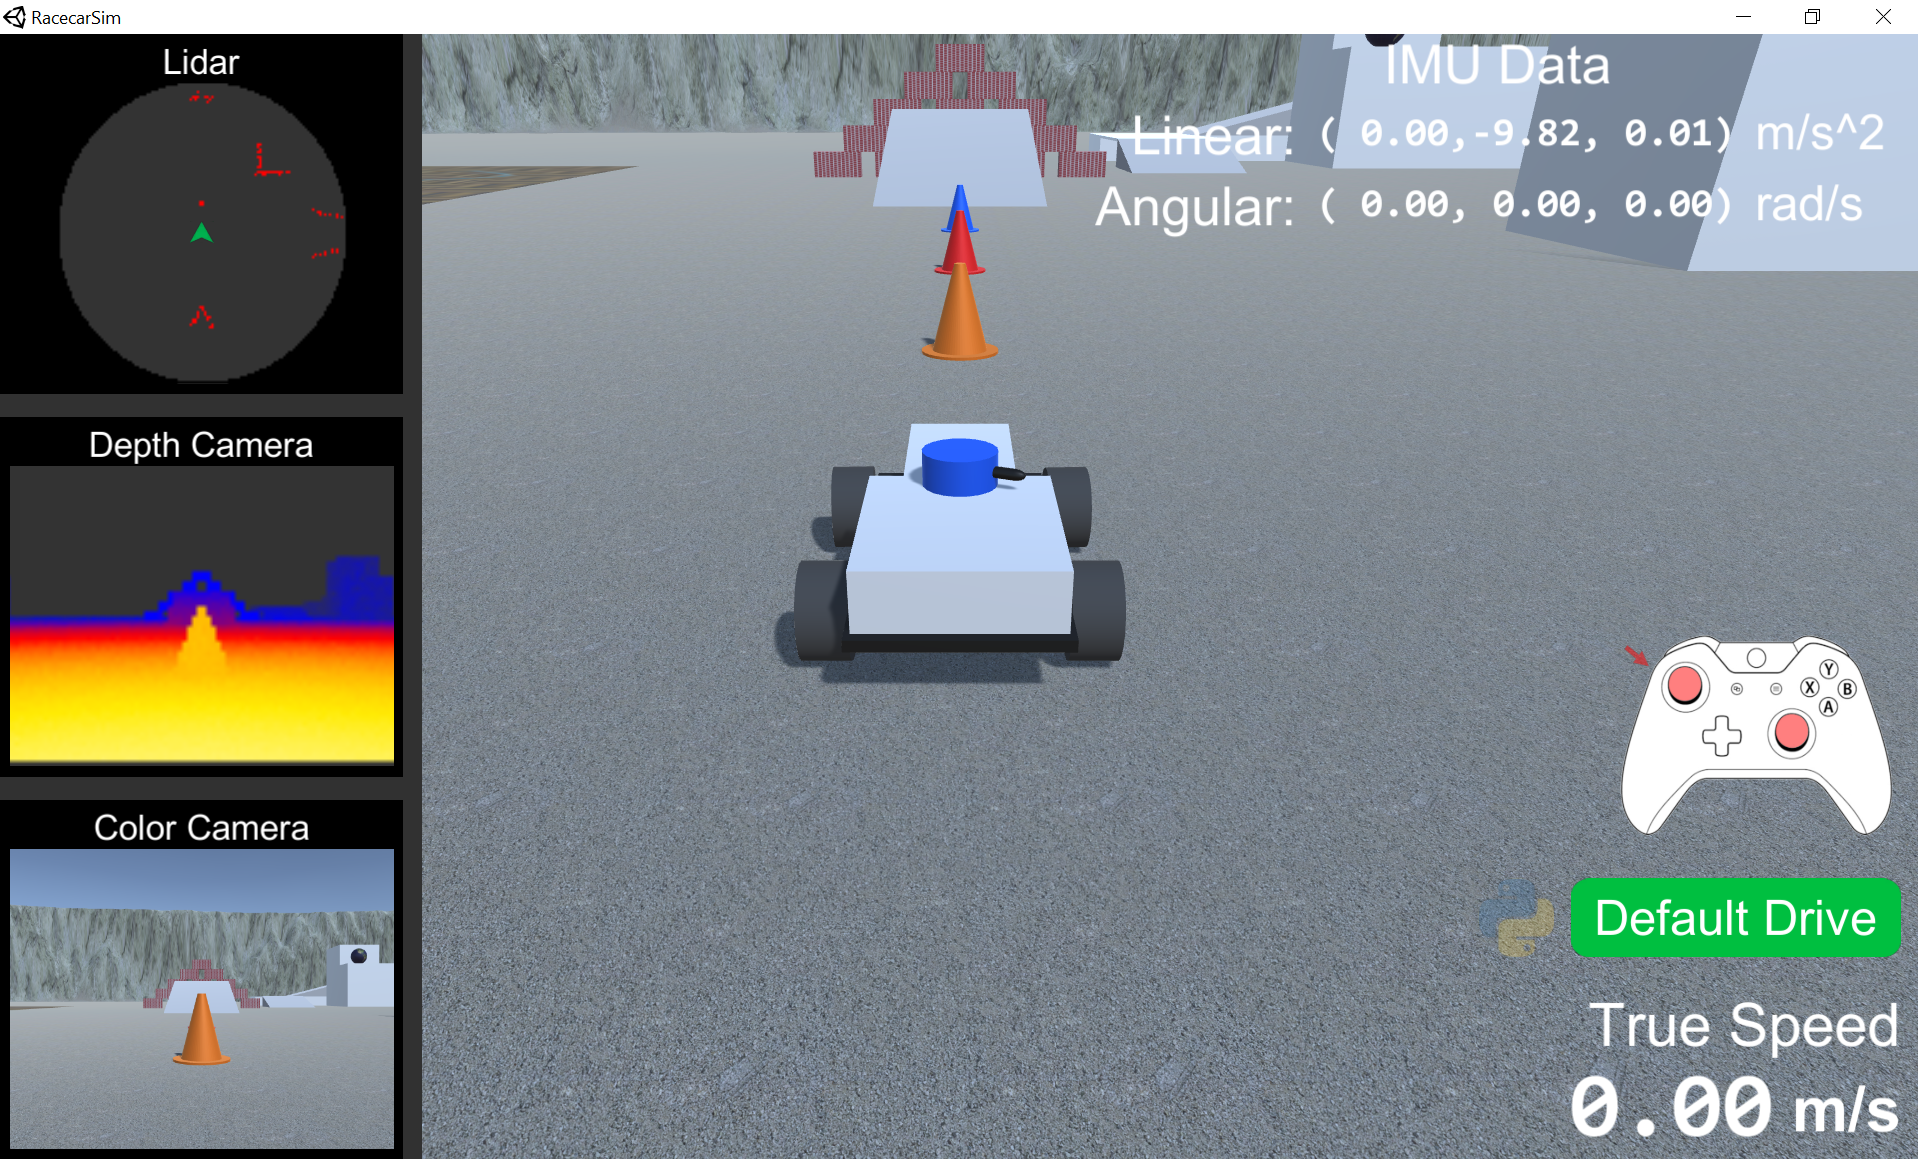
Once RacecarSim finishes loading, you should see a screen titled “RACECAR-MN Simulation”. Click the “Begin Simulation” button.
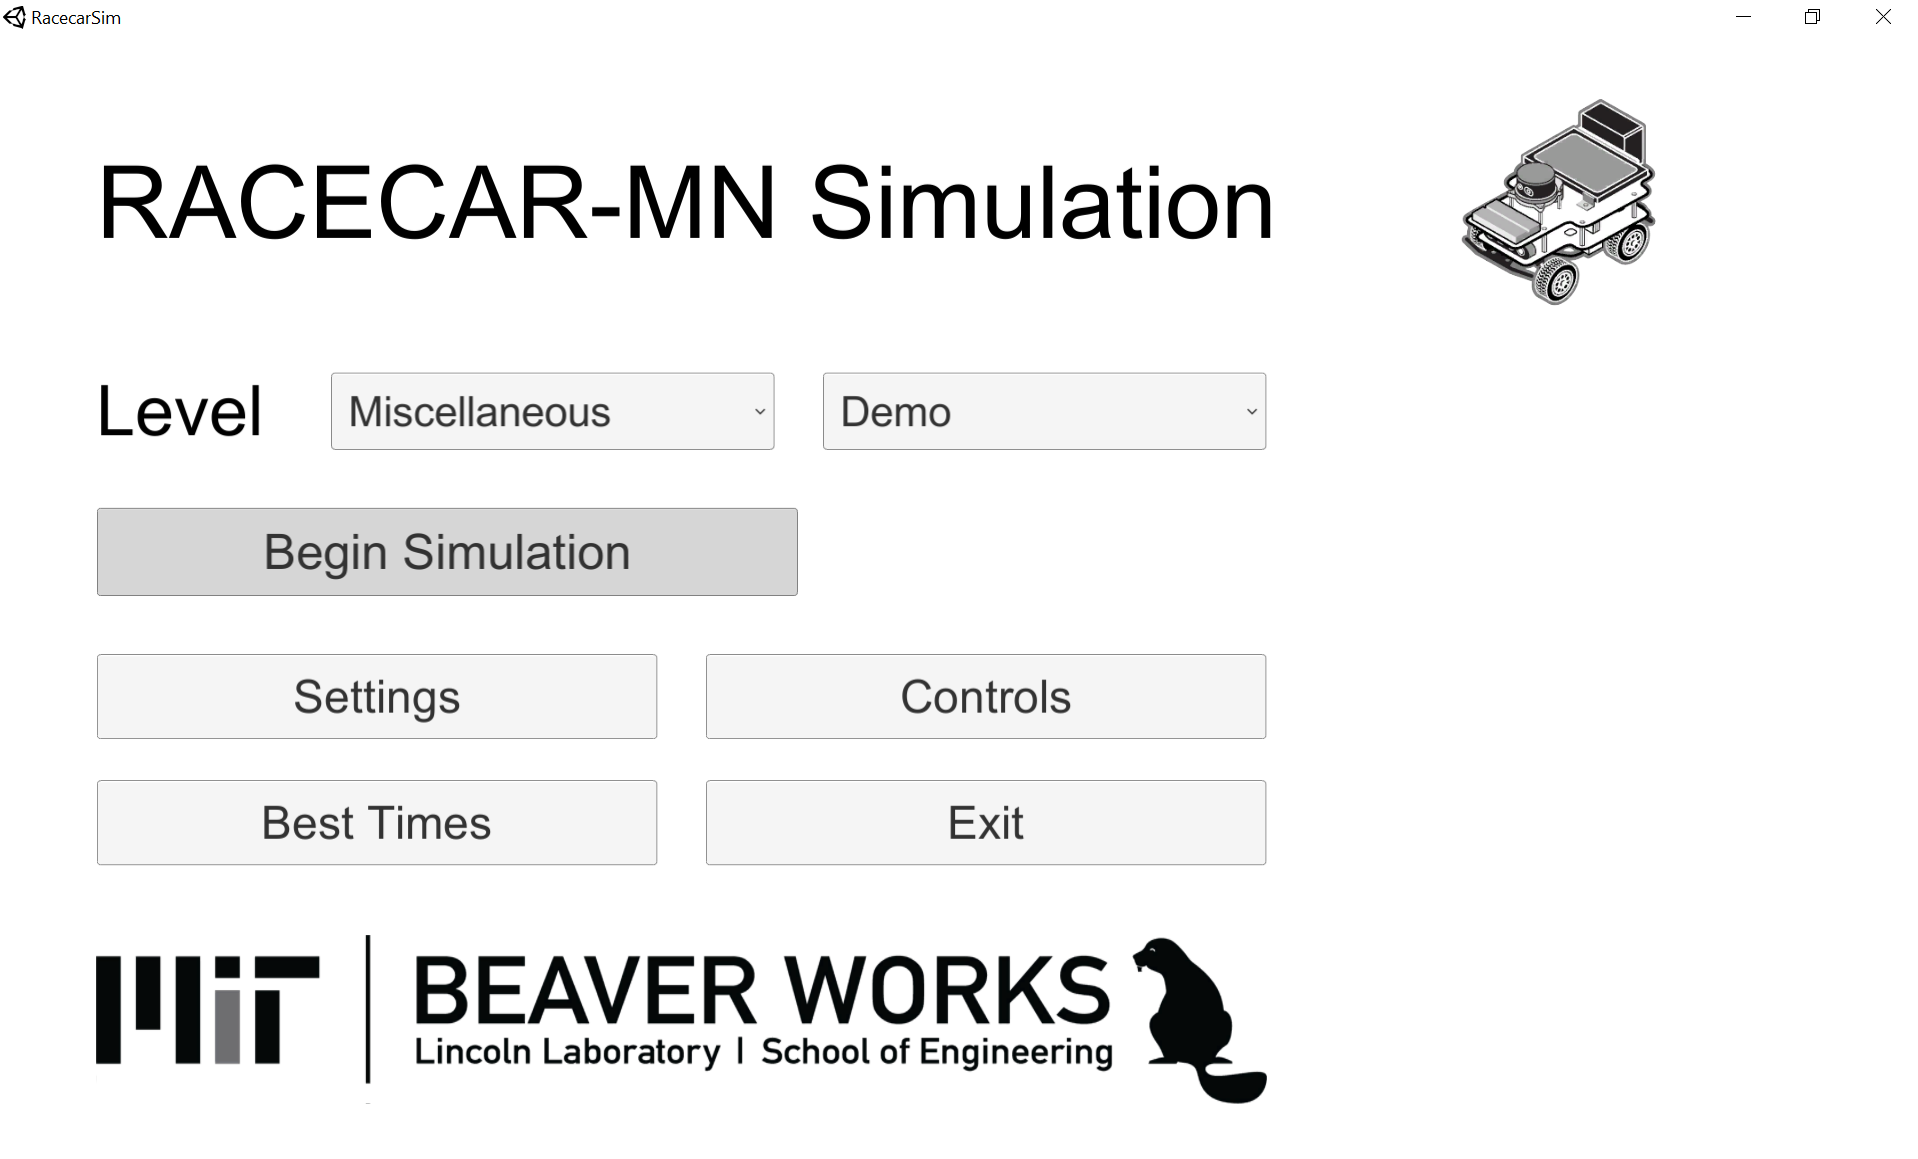
A level will load with the racecar. The car begins in default drive mode, allowing you to drive around with the standard default drive controls (triggers to accelerate, left joystick to steer).
1. When driving in default drive mode, the simulation has a very low frame rate and/or is lagged, making it appear choppy or delayed.
The depth camera is one of the most computationally intensive parts of the simulation. From the main menu, select “Settings” and reduce the “Depth Resolution”. This decreases the number of samples collected by the depth camera, which should decrease lag but may make programs using the depth camera less accurate.
If RacecarSim only lags when connected to a Python program but not in default drive mode, see the troubleshooting in Connecting a Python Program.